If you’re preparing for your pilgrimage, the question of what equipment to bring for the Camino de Santiago comes up very quickly. What gear should you choose? How do you prepare your Camino packing list without overloading yourself unnecessarily? And most importantly, how do you equip yourself properly without forgetting anything?
Having been through it myself, I know how stressful these questions can feel – especially when you’re about to walk for several weeks far from home.
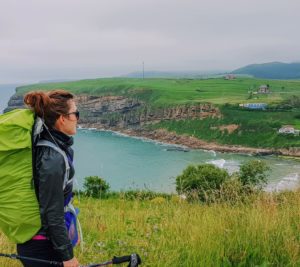
In this article, I’m sharing my real, practical experience and the gear selection I personally tested. My hope is to save you time (and a few blisters) thanks to what I learned after walking 40 days on the Camino in 2018 on the Camino del Norte and Camino Primitivo – lessons that proved just as valuable when I set off again on the Via Podiensis in 2023.
My personal story with the Camino and my gear
When I first left for the Camino (on the Arles route for one week), I thought I had prepared my equipment fairly well. But I quickly realized that what I had packed and what I actually needed were two very different things.I had followed the usual advice: choose comfortable, lightweight shoes, pick a backpack adapted to my body shape, try to limit the weight… Yet on the trail, things didn’t go exactly as planned.
Very quickly, I had to rethink certain choices, lighten my pack by sending a few unnecessary items home, and adjust along the way. My backpack went from almost 11 kg at departure to around 8 kg after adjustments. I also learned something essential: the right equipment isn’t the most expensive one – it’s the one that truly fits your real needs on the Camino.
I later returned for two more weeks on that same route, which allowed me to refine my experience even further. Then in 2018, I set off again – this time on the Camino de Santiago in Spain- determined not to repeat the same mistakes and to organize my equipment properly ahead of time.
What I’ve learned from all these experiences is this: you need to prepare well, but you also need to stay adaptable. Your equipment will inevitably evolve along the way – and that’s part of the Camino experience.
➡️ Every gram matters. It’s essential not to overload yourself.
And remember: most Camino routes pass through towns and villages where you can buy what you need if necessary. There’s no need to carry a 3-kilogram first-aid kit.
That’s actually one of the beauties of the Camino – this idea of stripping things down and returning to the essentials, something I talk about in my article “Why walk the Camino de Santiago?”
Today, with this experience behind me, I’ve decided to make things easier for you by sharing a clear, practical, field-tested Camino packing list so you can leave with a light, optimized backpack.
The basics: Camino equipment essentials
Backpack weight for long-distance hiking
Backpack weight in long-distance hiking isn’t just a minor detail – it’s the number one factor to consider when preparing your equipment for the Camino de Santiago. Why? Because let’s be honest, no one (and especially not me) is naturally minimalist. We always tend to add extra items or clothes “just in case.” But those famous “just in case” additions don’t stay tucked away at the bottom of a closet – they end up weighing on your back, kilometer after kilometer. And I can tell you, you’ll quickly regret that extra jacket or the third sweater you packed “just to be safe” after your first steep climb or your first full day under the Spanish sun.
So practically speaking, how much should your Camino backpack weigh? The general rule recommends not exceeding 15 to 20% of your body weight. For example, if you weigh 60 kg, your backpack should ideally not exceed 9 to 12 kg. But be careful – that upper range of 20% is really pushing it, especially for women or smaller builds like mine. Personally, I strongly recommend aiming closer to 10 to 15% of your body weight – or even less if you can manage it. To give you a concrete example, my backpack weighed around 8 kg all included for my 40 days on the Camino, and I weigh about 52 kg. And honestly, that was already more than enough.
And when I say “all included,” I truly mean it. That’s 8 kg with water, snacks, the first-aid kit – absolutely everything. The smallest last-minute addition – a pack of tissues, an extra water bottle, or even the lucky stuffed toy Aunt Janine gave you – adds up little by little. And the accumulation of all those “small things that don’t weigh much” eventually makes a difference. Even if your pack feels light when you test it at home, keep in mind that after 20 km of walking every day, with some elevation gain, you will feel it.
➡️ As for me, because I’m (slightly!) perfectionist, I chose to weigh everything before leaving – using a kitchen scale. I adjusted my gear along the way by sending a few unnecessary items back home and buying others that were better suited once I was on the road. The perfect backpack is always the one you refine day after day, because experience is the best guide.
Later on, I sent a few more items home but also bought others, which ultimately rebalanced the total weight.
Choosing the right backpack for the Camino de Santiago
If backpack weight is essential, the choice of your actual backpack for the Camino is just as crucial. It’s the one thing that will follow you day after day – and believe me, it can quickly become your best friend or your worst enemy on the trail. First piece of advice: really take the time to choose it, test it, and adjust it properly to your body. You might be tempted to use an old backpack that’s been sitting in a closet for years, but the Camino is far too long an adventure to allow yourself that kind of mistake.
Like many of the things I’ll go into below, it deserves an article of its own. But to keep it concise, here are the key criteria in my opinion: it should be as light as possible – that’s the whole point. It should be practical and functional; some models have lots of pockets and compartments, which can be really useful. And it shouldn’t be too big. There’s no need to go for a 75-liter backpack when you’re 1m50 like me… you’ll want to fill it, and you’ll inevitably end up over the weight limit.
➡️ As for volume, in general a 35- to 45-liter backpack is more than enough for the Camino, especially if you’re walking in spring or summer, when you can easily wash your clothes along the way. If you go beyond 50 liters, it’s already too big. And believe me: the bigger the backpack, the more you’ll be tempted to fill it with things you don’t actually need. Personally, I used a backpack of around 45 liters.
At the risk of repeating myself, it’s really, really important to anticipate your backpack weight – it’s a key factor and it can quickly become a problem for anyone who packed too much. Sure, we all know some “Mr. Whoever” who managed eight months with 20 kilos on his back. Good for him. But most people shouldn’t overload themselves. It’s hard on your back, hard on your knees… and you have to remember that yes, it can feel “light” when you leave your home and walk to the train station. But once you’re walking for hours and hours – uphill, downhill, and everything in between – the weight doesn’t feel the same anymore.
In the same way, it’s important to anticipate the full weight of your backpack. Meaning: with water and food. It’s all well and good to weigh everything down to the gram, but if you forget the one or two liters of water and the 500 grams of peanuts, you’ll end up overloaded very quickly.
➡️ Another essential point: choose a backpack that’s light but sturdy, ideally under 1.5 kg empty, with a ventilated back panel to avoid moisture building up against your back. A comfortable hip belt is absolutely essential, because it takes a huge amount of strain off your shoulders by distributing the weight properly. And I’ll add one detail that saved me more than once: an integrated rain cover, which is really practical on the Camino, where the weather can change quickly.
Take the time to test your backpack fully loaded with its real weight before you leave. Do a test hike, adjust the straps, move things around inside until you find your ideal balance. A badly adjusted or badly packed backpack can quickly become a nightmare for your shoulders, your lower back, and even your knees. And if you’re still hesitating between models, don’t hesitate to ask for advice in a specialist store or from other experienced pilgrims.
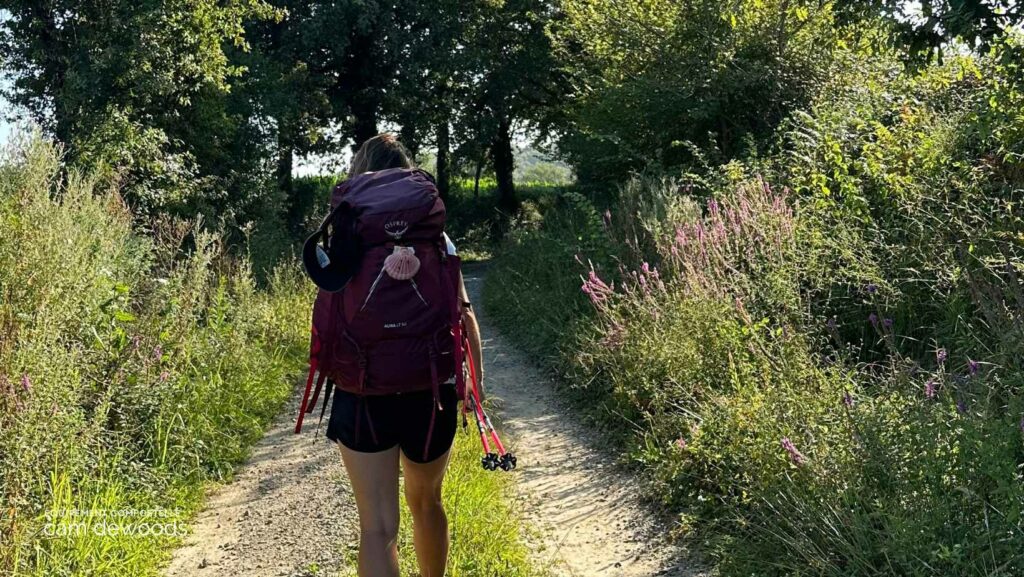
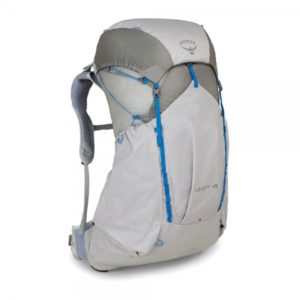
Personally, I chose an Osprey backpack – as light as possible, under 1 kg: the Levity 45, a unisex 45-liter model that genuinely impressed me with how lightweight it is. To quote the product description: “FEATHERLIGHT. The ultralight Levity, made with NanoFly™ fabric, features Osprey’s AirSpeed™ ventilated trampoline-mesh back system, making it an ideal backpack for experienced hikers looking to shave a few grams off their gear on multi-day trips.”.
Shoes: the most important choice in your Camino equipment
Ah, shoes. If there’s one decision you absolutely shouldn’t take lightly, it’s this one. Your Camino shoes will quite literally be your only vehicle for weeks. And believe me, if they fail you or start hurting, your entire adventure can quickly turn into a struggle.
When it comes to the Camino, there are usually two camps: high-cut boots or low-cut shoes. Personally, I chose mid-cut shoes — lightweight but sturdy, with a solid outsole. Why? Simply because the Camino isn’t a high-mountain trek where your ankles need maximum protection. Of course, there’s elevation gain, rocks, roots, and uneven terrain, but overall the trails are manageable in lighter footwear. What matters most is immediate comfort: your shoes must fit your foot shape properly and, above all, be fully broken in before you leave.
➡️ And when I say broken in, I don’t mean two or three short walks around your neighborhood. Ideally, you should walk in them regularly for several weeks before departure so they truly adapt to your feet. And here’s a small tip that can save you a lot of pain: choose shoes at least half a size bigger than your usual size. Your feet will swell over the days, and you could be in for a nasty surprise if you stick strictly to your standard size.
Another crucial question: breathable or waterproof shoes? Personally, I chose Gore-Tex shoes — waterproof yet breathable — perfect for rain or early-morning dew. But if you’re walking in the middle of summer, highly breathable shoes might be enough, provided you wear merino wool socks to regulate moisture. Whatever you choose, always bring two good pairs of quality hiking socks with you — they’re your best insurance against blisters and other unpleasant surprises.
A pair of sandals: don’t overlook this choice
You might be tempted to bring ultra-light flip-flops to save weight… but honestly, that’s not the best idea. On the Camino, it can get very hot, your feet can swell, sweat, or be soaked after a heavy downpour. And in those moments, having a proper pair of walking sandals can truly save your feet.
I’m speaking from experience: on the second day of my Camino, after hours of walking in pouring rain, the sun finally came out. My socks were drenched, my feet were stuck in wet shoes, and I could feel blisters coming. I slipped into my sandals and was able to keep walking while letting my feet breathe and dry. It was a real relief.
So opt for a comfortable model with good support and a durable sole, like those from Merrell or Teva. This kind of sandal can be useful for shorter stages, but also simply to relax at the end of the day, run errands, or give your feet a break after a long walk.
Clothing for the Camino: choosing wisely without overpacking
Preparing your clothing for the Camino is a delicate step: you need to anticipate a wide range of weather conditions while at the same time avoiding filling your backpack unnecessarily. Finding that balance isn’t easy — but it’s essential. As with all your Camino equipment, you’ll need to embrace a minimalist mindset. I know, it’s not easy to let go of certain “just in case” items, but trust me, you’ll be very glad not to be carrying 15 kilos on your back by the third day of walking.
To start with, prioritize lightweight technical clothing that dries quickly and breathes well. Why? Simply because you’re going to sweat, you’ll probably get caught in a few showers, and you’ll need to wash your clothes regularly at the end of the day. Fabrics like merino wool or certain lightweight synthetics work perfectly: they remain comfortable even after several days of intensive use, limit unpleasant odors, and above all, they dry very quickly after washing.
Keep versatility in mind as well. Every item you choose should serve more than one purpose. For example, convertible pants can function both as shorts and as full-length trousers depending on the weather. A lightweight waterproof and breathable jacket will protect you from rain but also act as a windbreaker on cool mornings. A simple buff or multifunctional scarf can shield you from the sun, the cold, or even dust. In short, every item should earn its place in your backpack.
➡️ Make sure to test your clothing several times before you leave. A long-distance hike like the Camino is not the time to discover that a T-shirt irritates your skin after two hours, that a sports bra is too tight, or that your pants feel uncomfortable in the heat. Your comfort depends largely on what you wear, so take the time to try everything beforehand.
Finally, never overestimate your needs. Three or four tops, two pairs of pants or shorts, a few pieces of underwear, and one versatile jacket will be more than enough. Always remember: the less you carry, the more you’ll enjoy the Camino by avoiding the fatigue that comes with a backpack that’s too heavy.
First-aid kit and hygiene products
Let’s be honest: compared to most hikers, my first-aid kit was extremely light. It was a mix of my “Sunday hiker optimism” – “nothing’s going to happen to me anyway” – my desire to lighten my load – “what do you mean 100 extra grams… no way” – and the simple fact that the Camino de Santiago often passes through towns and villages with pharmacies. I knew that in case of a medical issue, I could either ask another, more prepared pilgrim for help or wait for the next pharmacy along the way.
That strategy only works if you’re doing a long-distance walk similar in structure to the Camino. It would be unthinkable on a fully self-supported wilderness trek in remote mountain terrain.
As you can see from my weight breakdown, grams add up quickly, and the toiletry/first-aid kit is one of the heaviest categories. It’s easy to think, “Oh, it’s fine, I’ll take this cream, it doesn’t weigh much… and my favorite shower gel too, 200 grams is nothing,” forgetting that 1 kg is just ten “small items” of 100 grams each.
And don’t underestimate the weight of the toiletry bag itself. There are many practical models on the market – hanging versions with compartments, for example – but choose a lightweight one, of course (that’s the golden rule of long-distance hiking, in case you hadn’t figured it out yet).
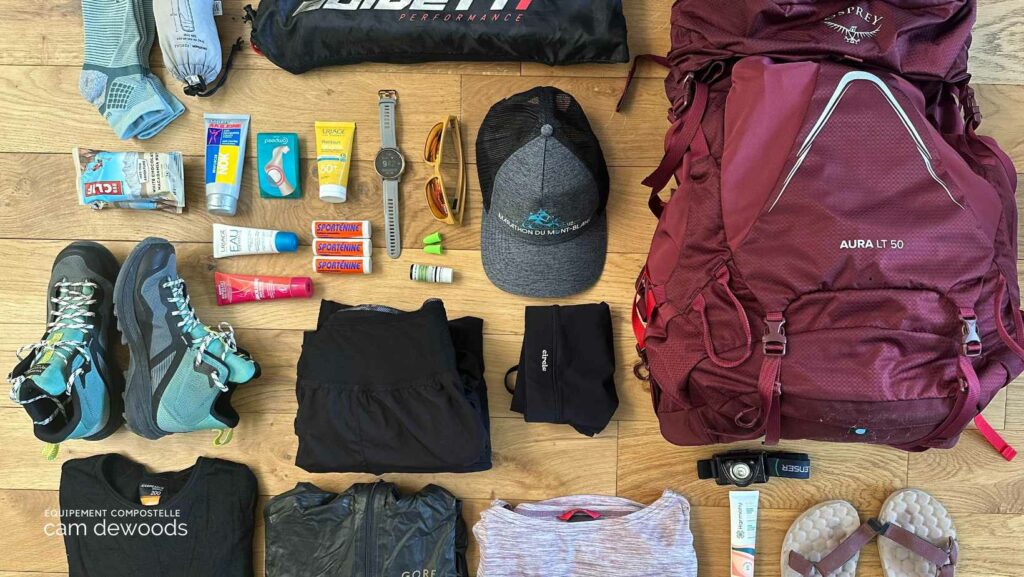
Camino backpack packing list
Now that you’re familiar with the general principles, here is the complete list of what I personally carried with me on the Camino, after carefully adjusting and testing every single item.
Of course, adapt it to your own preferences, your departure season, and your specific route — but it provides a solid, field-tested foundation to start from.
Essential documents
Let’s be clear: if you forget your underwear, you’ll probably manage for a few days. But if you set off without your ID and without money… things can quickly become complicated.
- ID card or passport: depending on your nationality. Personally, since I was walking from France into Spain, I only needed my national ID card. It’s often required in municipal albergues and, of course, at the airport.
- Bank card
- Cash: never underestimate the importance of always carrying some cash. Many municipal albergues and small shops in Spain don’t accept credit cards, and ATMs aren’t available everywhere. Always plan to have enough for two or three days of expenses so you don’t have to rely on other pilgrims — like I did at the beginning!
- The Credencial (pilgrim passport): essential if you want access to pilgrim-only albergues.
- Guidebook: paper version for some, mobile apps for others.
TIP: If you are worried, consider taking a secret pouch and avoid leaving your bag unattended in busy hostels.
Toiletry bag :
- Toothbrush and toothpaste
- Solid soap (ideal for both body and laundry)
- Solid shampoo or multi-purpose hair/body soap
- Solid deodorant or travel-size version
- Cotton swabs
- Small moisturizer (essential after days of sun, wind, or rain)
- Compact sunscreen (even on cloudy days, the sun is strong)
- Protective lip balm (essential against weather-chapped lips)
For women: sanitary products (tampons, pads), small compact razor
For men: compact shaving kit (razor + mini shaving gel or soap)
For women: personally, I didn’t wear makeup for 40 days and didn’t miss it at all. But some prefer to stay “well put together.” Just keep in mind: makeup means makeup remover — and that adds weight.
Minimalist first-aid kit
For my part, I reduced my first-aid kit as much as possible, relying on the regular presence of pharmacies along the Camino. That said, some essentials remain necessary.
- Anti-chafing cream (like Nok)
- Small compact scissors
- Tweezers
- Tissues
- Bandages
- Elastic bandages and adhesive tape
- Disinfectant (individual doses are very practical)
- Mini antibacterial gel
- Blister plasters (like Compeed — up to you; personally I don’t like them and prefer a regular bandage with healing cream)
- Arnica cream or oil (great after an intense day or muscle impact)
- Earplugs and, if needed, a sleep mask (personally I’ve never liked wearing one, but some people do — and it prevents being woken up by your dorm neighbor’s headlamp at 3 a.m. when they get up for a bathroom break)
- Painkillers (ibuprofen, paracetamol…)
- Medication for digestive issues (diarrhea or constipation)
- Anti-inflammatory
- Optional: mosquito bracelet (like Parakito) or small mosquito repellent cream depending on the season (useful in humid or wooded sections)
Sleeping gear :
- Sleeping liner (silk liner, lightweight and compact)
- Very lightweight sleeping bag (if needed depending on the season)
Lightweight electronics
To be completely honest, here too I prioritized lightness. My phone basically served as everything: travel journal (while some pilgrims carried notebooks), music player, camera, GPS, etc. There are pros and cons to that.
- Smartphone (my all-in-one tool: GPS, camera, journal)
- Charger + lightweight cable
- Small lightweight power bank (optional if you use your phone a lot)
- Possibly a wall adapter depending on your phone model (check before leaving!)
Shoes and sandals
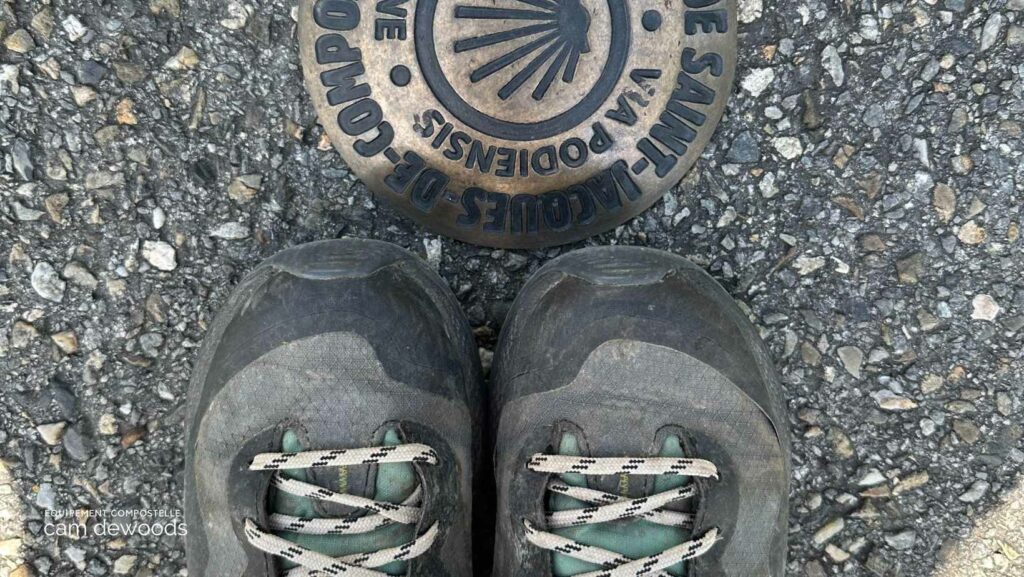
Hiking shoes: everyone has their own preferred model and brand. Some prefer high-cut boots, others low-cut. Some choose hiking shoes, others trail runners. Gore-Tex or not… it depends on the season, your preferences, and what feels best on your feet. Personally, I chose the Merrell MQM Edge Gore-Tex model, which was perfect from start to finish.
One pair of sandals: see advice above.
Clothing (ideal base tested over 40 days) :
- 1 waterproof windbreaker (I reused my ultra-light Gore-Tex jacket)
- 1 light fleece or thin thermal layer
- 1 lightweight rain poncho
- 1 set of thermal base layers (I really like Icebreaker models)
- 4 comfortable technical underwear (avoid cotton — it dries poorly)
- 4 pairs of anti-blister hiking socks (ideally merino)
- 3 to 4 lightweight, breathable technical T-shirts
- 2 or 3 shorts or convertible pants (I favored shorts — more comfortable in hot weather)
- 1 light sleep outfit for evenings in albergues (personally, I simply kept a clean T-shirt and shorts; I didn’t carry dedicated pajamas)
- Ultra-light, compact microfiber towel
- Sunglasses
Optional useful accessories:
- Lightweight belt (some pilgrims lose weight quickly!)
- Light hat or cap
- Swimsuit
- Light outfit for visiting towns, going to the beach, or relaxing in the afternoon
- Light beanie, light gloves, multifunction buff (depending on season and route)
- Small tote bag or ultra-light bag for evening groceries
- Compact laundry bag (or simple reusable plastic bag)
- The famous Camino scallop shell – which you’ll most likely find along the way!
For those who want to camp on the Camino
I’m not the most qualified to talk about this since I stayed in albergues throughout. Camping does offer certain advantages on the Camino. However, by not following the same daily rhythm, rituals, and accommodations as most pilgrims, it can create a bit of distance from the shared experience.
- Ultra-light tent or hammock with tarp (lighter than a tent)
- Lightweight sleeping pad
- Sleeping bag adapted to the temperatures of your chosen route
- Small lightweight clothesline (to dry clothes in the evening)
Optional:
- Cooking gear (small stove, etc.): campers follow the same routes as other pilgrims, so they aren’t in remote mountains and can resupply in towns or even eat in albergues
- Water filtration straw for non-potable water
That should cover the essentials.
Feel free to ask questions if needed, and remember that this overview is mainly based on my own experience — a 40-day Camino between May and July. Every long-distance hike is unique, and climate, weather, and route conditions will inevitably influence your gear choices and the precautions you need to take before leaving.
You can also read my article about Camino de Santiago accommodation for more details.